

Browse by Product Category
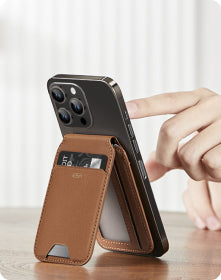
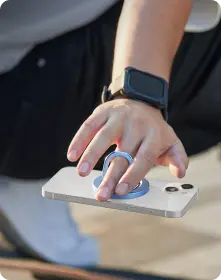
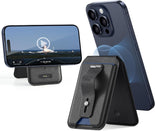
Geo Wallet Stand
Setup Video
Frequently Asked Questions
First, make sure your Geo wallet is paired to your iPhone by following the instructions.
1. Press the power button once to turn on your Geo wallet.
2. Turn on Bluetooth on your iPhone.
3. Open the Find My app on your iPhone.
4. On the Items tab, tap Add new item.
5. Tap Other Supported Items (your iPhone will search for your Wallet).
6. Once your wallet is detected, tap Connect.
7. Follow the on-screen instructions to name it and register it with your Apple ID.
If your iPhone can't detect your Geo wallet, check the following:
1. Ensure that your Geo Wallet battery is sufficient. Use the included charging cable to fully charge your Geo Wallet. (The status light will turn green when it is fully charged.)
2. Your iPhone's Bluetooth is turned on. (Swipe down from the top right corner of the screen to open the Control Center, then tap the Bluetooth icon.)
If your iPhone still can't detect your Geo wallet, perform a factory reset (quickly press the power button four times then hold it down for at least three seconds), then follow the steps above to pair again.
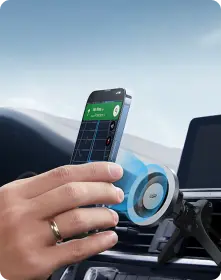
Yes. If your wallet is out of range of your phone for a period of time, Find My will send you a "Walk Away" notification. Geo Wallet connects to your phone via Bluetooth and has a range of up to 50 meters.
Therefore, a "away notification" will be sent if your Geo Wallet is outside this range or if the Bluetooth connection is blocked by interference or a physical barrier.
If you lose your Geo Wallet, depending on the situation, you can find it in one of the following ways:
1. If your wallet is within hearing range, try playing a sound alert: Open the Find My app > Tap the Items tab > Select your wallet in the Items list > Tap Play Sound.
2. If your wallet is out of hearing range and in an area with other Apple devices, you can use the Maps app to find it: Open the Find My app > tap the Items tab > select your wallet in the Items list > tap Directions to view your wallet's location in the Maps app.
3. If your wallet is out of hearing range and in an area with no other Apple devices, you can set up Lost Mode (you'll be notified when its location is available and can leave your contact details): Open Find My app > Tap the Items tab > Select your wallet in the Items list and scroll down > Make sure Notify when away is turned on > Tap Enable in Lost Mode > Tap Continue > Enter your phone number/email address (so that anyone who finds your wallet can contact you) > Tap Enable.
If you see this alert, make sure that:
1. "Find My iPhone" is enabled on your iPhone. (Settings > Tap "Your Name" > Tap "Find My iPhone" > Tap "Find My iPhone" > Turn on "Find My iPhone")
2. Your iPhone's Bluetooth is turned on. (Swipe down from the top right corner of the screen to open the Control Center and tap the "Bluetooth" icon.)
3. Have a strong and stable Wi-Fi/mobile data connection.
4. Make sure your phone has the correct date and time set to ensure the Find My app syncs with Apple servers.
5. Make sure you are logged in to your Apple ID.
For the strongest magnetic fit, use an ESR HaloLock™ or Apple MagSafe case. The magnet on the case will guide you to the direction that the wallet will attach.
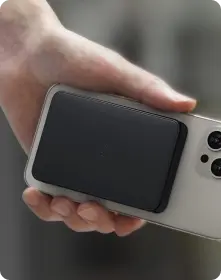
When putting your phone in or taking it out of your pocket, hold both your phone and your wallet. Depending on how narrow your pocket is, your wallet may fall out.
What kind of warranty does the ESR provide?
All ESR products come with a 12 month warranty, contact our support team and we'll respond to you personally within 24 hours.